Managing complex forms in React using Formik and Yup
Managing complex forms in React isn't easy. Luckily, libraries like Formik and Yup exist to make creating complex forms simpler. In this article, Jessica helps you get up and running with both.
Table of contents
Forms are more than just formalities; they are the bridges that connect users to the very essence of an application. With forms, your application users can log in, make purchases, contact support, and ultimately, provide feedback on your product. In the end, creating forms that validate each piece of information submitted is a crucial concern for any developer.
In this article, you will learn how to use Formik and Yup to create and validate forms. The best part is that you will hop on a Frontend Mentor challenge to create a sign-up form that tests your skills!
Challenges in managing forms in React
Managing simple forms can be relatively easy, but when it comes to complex forms, it can be one heck of a challenge. From tracking multiple input fields to setting up validation rules for email formats, phone numbers, or passwords to displaying custom error messages, all these can quickly become cumbersome, requiring you to write a lot of code.
However, with technologies like Formik and Yup, you can make form management and validation significantly easier while ensuring your code is structured and maintainable.
Formik

Formik is a developer's go-to library for effortless form handling and validation. Its reputation as a top choice library for form management isn't just hype - it truly simplifies form management and makes debugging and testing a breeze.
Setting up Formik in React
To get started with Formik, you must first install the library. To do this, you may either create a new React project or use an existing one. In any case, navigate to your project root directory and run the following command:
npm install formik
or
yarn add formik
Next, let's begin with developing and validating this registration form using Formik. Through this challenge, we'll explore concepts like building forms, validating form input, displaying errors, and handling form submissions.

Step 1: Import the useFormik Hook from Formik like this:
import { useFormik } from "formik"
Step 2: Initialize the useFormik hook and define your form initial values and the onSubmit function.
const formik = useFormik({
  initialValues: {
    firstName: "",
    lastName: "",
    email: "",
    password: "",
    confirmPassword: "",
  },
  onSubmit: (values) => {
    alert(JSON.stringify(values));
  },
});
In this code, the useFormik hook takes an object as an argument with two properties:
-
initialValues: which defines the initial state of your form fields. In this case, an empty string specifies each field. -
onSubmit: This function is triggered on submission of the form.
Step 3: Track input changes using Formik.
In Formik, we register the initial values for each input field and then track changes to those values using the name and handleChange function.
<form>
  <label htmlFor="first-name">
    <input
      placeholder="First Name"
      type="text"
      id="first-name"
      name="firstName"
      value={formik.values.firstName}
      onChange={formik.handleChange}
    />
  </label>
</form>
This makes input handling clean and simple compared to working with React states and its onChange handlers.
Step 4: Add validation with Formik.
Let's go ahead and add a validate function that handles all of our form validation logic inside the useFormik object.
const formik = useFormik({
  initialValues: {
    firstName: "",
    lastName: "",
    email: "",
    password: "",
    confirmPassword: "",
  },

  //validate form logic function
  validate: (values) => {
    const errors = {};
    if (!values.firstName) {
      errors.firstName = "First Name is required";
    }
    if (!values.lastName) {
      errors.lastName = "Last Name is required";
    }
    if (!values.email) {
      errors.email = "Email is required";
    } else if (!/^[^\s@]+@[^\s@]+\.[^\s@]+$/.test(values.email)) {
      errors.email = "Invalid email format";
    }
    if (!values.password) {
      errors.password = "Password is required";
    }
    if (!values.confirmPassword) {
      errors.confirmPassword = "Password is required";
    }
    if (values.password !== values.confirmPassword) {
      errors.confirmPassword = "Passwords do not match";
    }
    return errors;
  },
  onSubmit: (values) => {
    alert(JSON.stringify(values));
  },
});
The validate function enforces validation rules. It accepts the current form input values, validates them based on provided conditions, and returns an error object with any validation errors.
Here, a check is done to see if any of the form values is an empty string. If it is, a custom error message “Form-field-name is required” will be added to the error object. For fields like email, an extra validation is done using regex. This expression verifies that the email address input is of a valid format, and if it is not, a corresponding error message is added to the error object.
Form submission and error handling with Formik
Putting it all together, it’s time you learn how to handle form submission and display error messages in your forms. In Formik, the handleSubmit function is called the form handler. It is what fires your onSubmit function, and this method is passed to the form onSubmit event listener.
<form
  onSubmit={formik.handleSubmit}
>
  <label htmlFor="first-name">
    <input
      placeholder="First Name"
      type="text"
      id="first-name"
      name="firstName"
      value={formik.values.firstName}
      onChange={formik.handleChange}
      onBlur={formik.handleBlur}
    />
  </label>
  <p>
    {formik.errors.firstName && formik.touched && formik.errors.firstName}
  </p>
</form>
Once a field has been touched, that is, clicked on by the user, the validate method is triggered. This method gives you access to an error object containing errors from all your form fields. With this, you can display error messages for input fields with validation issues, and until every error has been resolved, the submission logic will be prevented from being executed.
However, if you’d like to show validation errors only when an input field value has been changed, use the dirty method instead rather than touched.
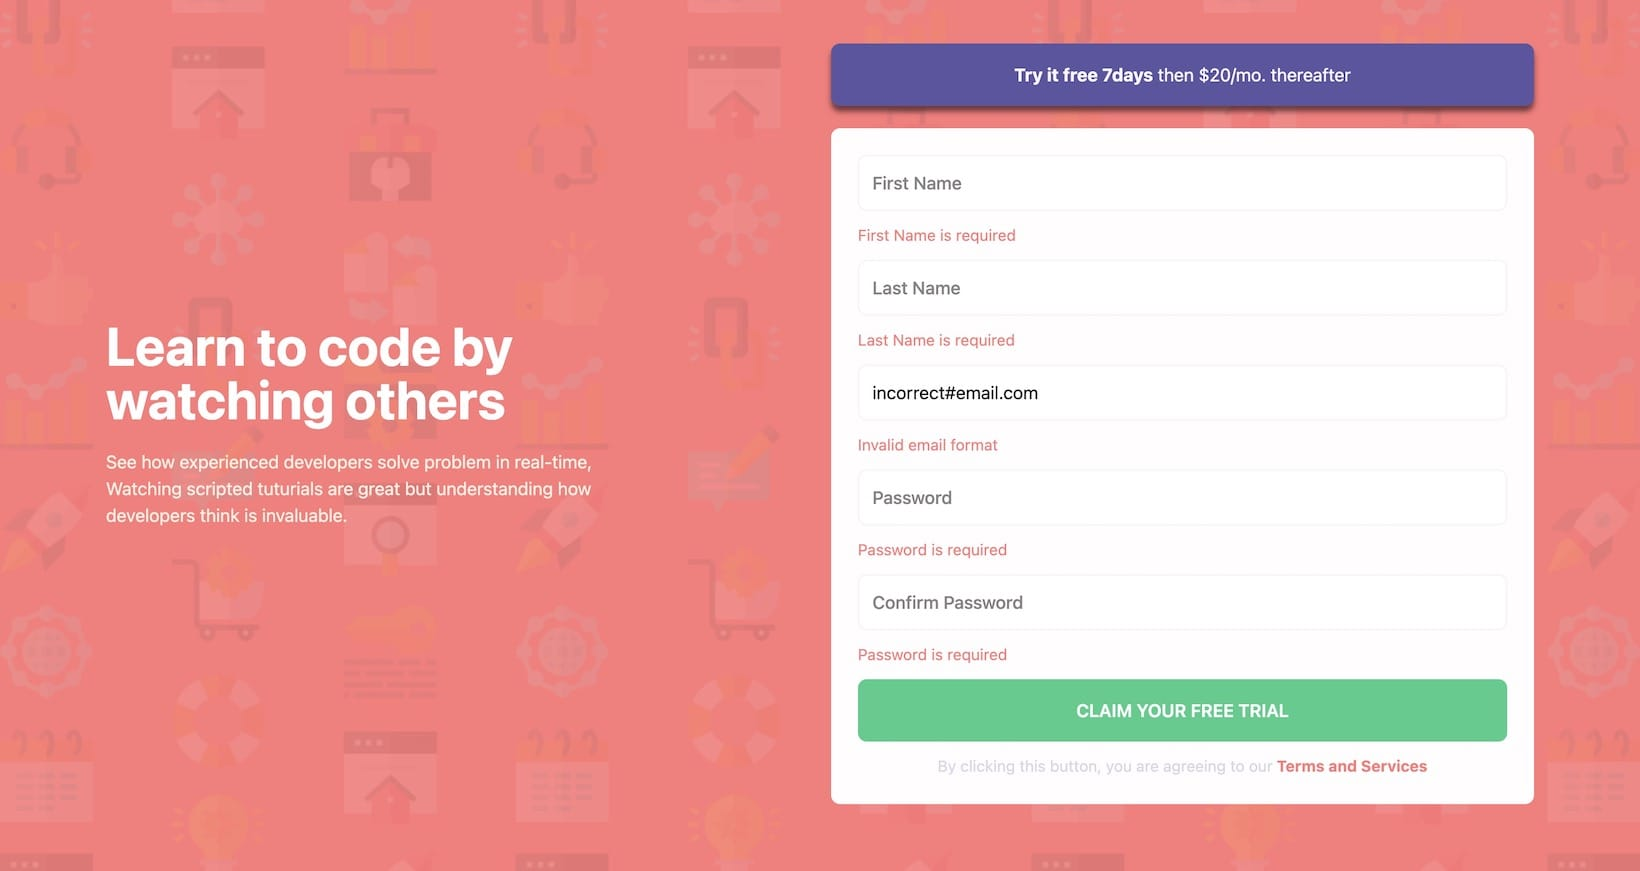
It is all coming together! Now, have a go at using Formik to set up the other form input fields, including their validations. If you encounter any challenges, you can refer to this repository to help you get back on track. Once you’re done, your form validations should look something like this:

Although this feels great, we're probably still writing more code than necessary. Take a peek at your validate function. Imagine if you had many more input fields - the code could become messy, hard to maintain, and difficult to update. This is one reason why Yup, a validation library, could be so helpful.
Yup

Yup is a schema validation library that helps developers ensure that their form data conforms to the intended structure and format. Some of the advantages of utilizing Yup as a validation schema are as follows:
-
Validation: With Yup, you can easily enforce type safety to verify that your form fields match the defined structure and format.
-
Code quality: Yup improves code quality, making it easier to debug, maintain, and update your codebase.
-
Error handling: With Yup, error handling is no longer a hassle. It allows you to provide clear and descriptive input error messages for your application users, helping them correct their inputs.
Setting up Yup in React
To get started with Yup, navigate to your project root directory and run the following command:
npm install yup
or
yarn add yup
Defining schemas with Yup
A schema defines your data structure and the expected type. There are different libraries to choose from when working with schemas, but in this article, we will work with Yup. Let's take a look at how to define schemas and perform validation with Yup:
Step 1: Import Yup
import * as Yup from "yup"
Step 2: Define your form schema
validationSchema: Yup.object().shape({
  firstName: Yup.string().required("First name is required"),
  lastName: Yup.string().required("Last name is required"),
  email: Yup.string()
    .required("Email is required")
    .email("Invalid email address"),
  password: Yup.string()
    .required("Password is required")
    .min(6, "Password must be at least 6 characters"),
  confirmPassword: Yup.string()
    .required("Password confirmation is required")
    .oneOf([Yup.ref("password"), null], "Password confirmation must match password"),
})
Now let us go over the schema rules for each form field:
-
firstNameandlastName: are required fields that must be strings. -
email: a required string field that is validated using the.email()method. -
password: a required string field with a minimum length of six characters. -
confirmPassword: a required string field with the.oneOf()method. Here, a reference is made to the password in the schema. It compares the values entered inconfirmPasswordagainst the values entered inpassword, and if there is no match, the error message “Password confirmation must match password” is displayed.null, in this case, serves as a fallback value. When the password field is blank, the default comparison value is set tonull, and the error message “Password confirmation must match password” will be displayed.
Step 3: Replace your validate function with your newly defined validationSchema. Note that when using Yup, the key changes from validate to validationSchema.
const formik = useFormik({
  initialValues: {
    firstName: "",
    lastName: "",
    email: "",
    password: "",
    confirmPassword: "",
  },

  validationSchema: Yup.object().shape({
    firstName: Yup.string().required("First name is required"),
    lastName: Yup.string().required("Last name is required"),
    email: Yup.string()
      .required("Email is required")
      .email("Invalid email address"),
    password: Yup.string()
      .required("Password is required")
      .min(6, "Password must be at least 6 characters"),
    confirmPassword: Yup.string()
      .required("Password confirmation is required")
      .oneOf([Yup.ref("password"), null], "Password confirmation must match password"),
  }),

  onSubmit: (values) => {
    alert(JSON.stringify(values));
  },
});
Enhancing form validation with Formik and Yup
Good job! You've successfully integrated Formik and Yup to create a validated sign-up form. With all the new changes you have integrated by combining these two libraries, let’s take a look to ensure that your form works perfectly as it should.

Conclusion
In this article, we delved into the challenges associated with managing complex forms and explored the use of Formik for form management. We also looked at creating schemas and validating form types using Yup. With the insights from this article, you have everything you need to manage and validate forms in your React applications. Happy coding!
Take your skills to the next level
- AI-powered solution reviews
- 50+ portfolio-ready premium projects
- Professional Figma design files