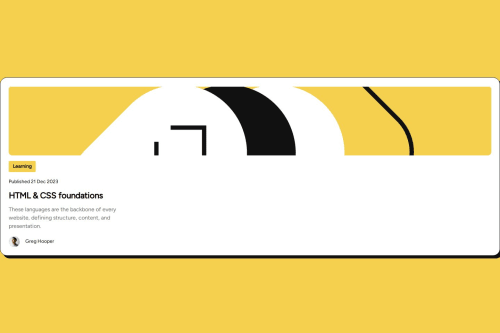
Blog-post Card using flex-box

Solution retrospective
I am proud of the way the project turned out, I would do the structuring of containers properly next time.
What challenges did you encounter, and how did you overcome them?I didn't know how to self host fonts, I googled and learned how to do that.
What specific areas of your project would you like help with?I would like to get comments on all aspects of the project since I am a beginner.
Please log in to post a comment
Log in with GitHubCommunity feedback
- @skyv26
Hi @Nebil-Abdulfetah, 👋
Your implementation looks solid overall, but there are some key areas where you could improve accessibility, semantics, and maintainability. Let’s dive into each point with detailed explanations and examples. 😊
1️⃣ Use
<img>Tag for Content ImagesObservation:
In the code, important content-related images (e.g., profile image and card image) are added as background images using CSS.
Why This Matters:
Using semantic HTML is like giving clear directions to someone unfamiliar with a place. For instance, imagine handing someone a well-labeled map versus a scribbled napkin drawing. Screen readers, search engines, and other assistive tools rely on proper semantic tags to understand the content's intent. By placing content images inside
<img>tags:- You improve accessibility for visually impaired users.
- You make your content SEO-friendly.
- You clearly communicate the purpose of the image.
Refactored Code:
Profile Section:
<div class="profile">
  <img
    src="../assets/images/image-avatar.webp"
    alt="Profile picture of Greg Hooper"
    class="profile-img"
  />
  <div class="profile-name">Greg Hooper</div>
</div>
CSS:
.profile-img {
  width: 32px;
  height: 32px;
  border-radius: 50%;
}
Card Section:
<div class="card">
  <img
    src="../assets/images/illustration-article.svg"
    alt="Illustration for the article"
    class="card-img"
  />
</div>
CSS:
.card-img {
  height: 200px;
  width: 100%;
  border-radius: 10px;
  object-fit: cover;
}
Key Takeaway:
Images that convey meaning should always be inside
<img>tags with properaltattributes. Background images should be reserved for decorative elements that do not add value to the content itself.
2️⃣ Decorative Images Belong as Backgrounds
Observation:
While content-related images are placed as backgrounds, it’s good practice to limit this approach to purely decorative images (e.g., subtle patterns or visual enhancements).
Example in Real Life:
Think of this as placing a motivational poster in a meeting room. It's there to add ambiance but doesn't affect the meeting's purpose or decision-making.
Recommendation:
For purely decorative images, continue using CSS background properties but ensure:
- They do not mislead or confuse screen readers.
- They do not include important visual content.
Final Thoughts: 🌟
- Your work is heading in the right direction. Refining semantic HTML practices will boost the quality and accessibility of the project.
- These changes will improve usability and make your code more professional and maintainable for the team.
Keep up the great work! 🚀 Let me know if you have any questions or need further clarification. 😊
Marked as helpful
Join our Discord community
Join thousands of Frontend Mentor community members taking the challenges, sharing resources, helping each other, and chatting about all things front-end!
Join our Discord