Responsive landing page, form validation with React Hook Form and Yup

Solution retrospective
- The first time using
useFormandyup, successfully implemented validation that matches the design. - Handled the autofill styles for browser auto-filled content.
- Next time, I will practice more scenarios using
useFormandyupfor validation.
-
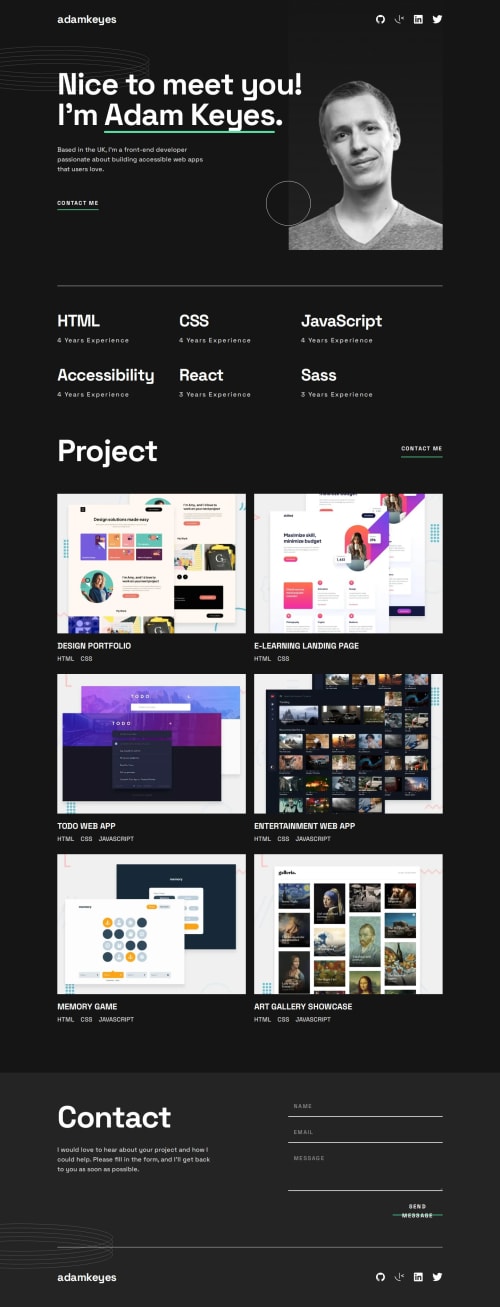
Displaying different images in
HeroSectionbased on screen width Used thesrcsetattribute in the<img>element to automatically switch images based on device width:<img className="h-full w-full object-cover" src={authorImageMobile} srcSet={`${authorImageMobile} 600w, ${authorImageTablet} 768w, ${authorImageDesktop} 1440w`} sizes="(max-width: 768px) 600px, (max-width: 1440px) 1024px, 1440px" alt="Author profile" /> -
Inconsistent spacing between blocks in RWD Created a reusable
Spacingcomponent instead of writing spacing directly inclassName, making it easier to apply RWD logic for different device spacing needs.- Drawback: It introduces four extra DOM elements.
-
Implementing the underlined text effect in
HeroSectionThe design required the underline to overlap part of the text.underline: Positioned below the text, unsuitable for this effect.border-bottom: Based on the content block and couldn't be offset.- Solution: Used the
::afterpseudo-element:<span className="relative"> Adam Keyes <span className="absolute bottom-[3px] left-0 w-full h-[6px] bg-green-5"></span> </span>
-
Validating email format and required fields Used
yupfor validation and error messages to ensure proper feedback. -
Avoiding browser's default email format validation Used
<form noValidate>to disable the browser's default validation. -
Overriding browser autofill styles Applied custom styles to ensure consistent autofill appearance:
input:-webkit-autofill {
  -webkit-box-shadow: 0 0 0px 1000px #242424 inset !important;
  box-shadow: 0 0 0px 1000px #242424 inset !important;
  -webkit-text-fill-color: #ffffff !important;
  caret-color: #ffffff !important;
}
input {
  color: #ffffff !important;
}
and
<input
  className={`h-full w-full border-b bg-transparent pb-4 pl-6 text-white focus:border-green focus:outline-none 1440:pl-4 ${
    errors.email ? "border-red-500" : "border-gray-300"
  }`}
  {...register("email")}
  type="email"
  name="email"
  style={{
    backgroundColor: "transparent",
    WebkitBoxShadow: "0 0 0px 1000px #242424 inset",
    WebkitTextFillColor: "#ffffff",
    color: "#ffffff",
  }}
  onFocus={(e) => (e.target.style.WebkitTextFillColor = "#ffffff")}
  onBlur={(e) => (e.target.style.WebkitTextFillColor = "#ffffff")}
/>
Do you have any better methods or suggestions for configuring browser autofill styles?
Please log in to post a comment
Log in with GitHubCommunity feedback
No feedback yet. Be the first to give feedback on MiJouHsieh’s solution.
Join our Discord community
Join thousands of Frontend Mentor community members taking the challenges, sharing resources, helping each other, and chatting about all things front-end!
Join our Discord