@Jxnfernandx

P
Elyse Kanagaratnam
@elyyyseAll comments
- P@elyyyse
Hi, Jonfernando - Your project looks great! And your API call is clear and easy to read.
You mentioned media queries — if you're taking a mobile first approach (meaning all of your CSS above the media query is your mobile design), then I think you want to switch your media query to read: min-width: 600px. So all of your styling applies to a smaller screen, and then as soon as the viewport hits 600px or wider, the styles wrapped in the media query will apply.
One other thing you might consider — right now, the only way to get a new bit of advice is to hard refresh the whole page. If you add a click event listener to the big green button, you can re-call the API when a user clicks it.
// wrap your fetch() call in a function
function generateAdvice () {
     // API call goes here
}

// call it once on page load
generateAdvice();

// call it again whenever the button is clicked
bigGreenBtn.addEventListener('click', generateAdvice);
I hope this all makes sense. Feel free to reply back if anything is unclear.
- @MatthewCCSP@elyyyse
Hey, Matthew - Great question! I think for something like this, radio buttons are your best bet. You give them all the same name, and the browser will automatically ensure the user can only pick one at a time. And since they're an official browser input, you can wrap them and your button in <form> tags and just have the one event listener on submit. You get a bunch of accessibility features for free doing it this way.
Marked as helpful - @Mahdii-KariimiianP@elyyyse
Hi, Mahdi - Firstly, this interactive scroll you created is quite impressive. That's a lot of logic to figure out! I'm certain that building it this way was not a waste of time because you probably learned a ton.
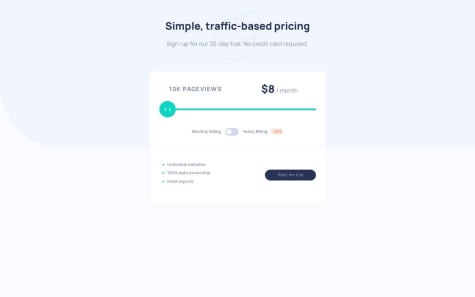
One way to shorten your code (and make your app more accessible) is to leverage functionality that the browser gives you for free. In this case, instead of using a <div>, I might consider using the native <input type='range'> as your interactive scroll.
Your HTML would look something like this:
<label for='scroll'>
     // 'min' and 'max' set because you have 5 possible values
     // 'step' will cause the scroll to snap from value to value
     <input type='range' id='scroll' min='0' max='4' step='1'>
</label>
And then in your JS:
// you can create an array that holds all your pricing options
const PRICING = [
{ pricePerMonth: 8, pricePerYear: 72, pageviews: '10K' },
{ pricePerMonth: 12, pricePerYear: 108, pageviews: '50K' },
 ...etcetera
];

// select your range input and listen for changes
const scroll = document.querySelector('input[type=range]');
scroll.addEventListener('change', () => {

// set your various innerTexts using your
// PRICING array and range input values
     PRICING[scroll.value].pricePerMonth
     PRICING[scroll.value].pricePerYear
     PRICING[scroll.value].pageviews

});

// you could also add an event listener to your checkbox,
// and update your pricing each time that value changes
I hope this makes sense! I see you're already using a checkbox and a button, so you're no stranger to using native browser inputs. Please feel free to reply back if anything I wrote is unclear. Have fun!
Marked as helpful - @IdrissaMurengaP@elyyyse
Hi, Idriss - Nice job here! Since you implemented all of your colors as CSS variables, it will actually be pretty easy to add the theme change.
I see you started with the dark mode, which is great. You'll want to add your background image(s) here, as well.
:root {
    --bg-primary-clr: hsl(235, 21%, 11%);
    --bg-secodary-clr: hsl(0, 0%, 98%);
    --bg-third-clr: hsl(235, 24%, 19%);
          etcetera...
    --bg-image: url(./assets/images/bg-desktop-dark.png);
}
Next, you'll want to define a class for the light mode and re-assign your variables to their new respective values.
.light-mode {
    --bg-primary-clr: NEW-COLOR-HERE;
    --bg-secodary-clr: NEW-COLOR-HERE;
    --bg-third-clr: NEW-COLOR-HERE;
          etcetera...
    --bg-image: url(./assets/images/bg-desktop-light.png);
}
And lastly, back in your JS, you'll need to make it so that when users click the sun icon, the
light-modeclass is added to the<body>element. I see you already have the moon icon in your header with ahiddenclass on it, so that will be easy to swap. And then of course, when users click the moon, you'll need to do the reverse.I hope this makes sense! Feel free to let me know if anything is unclear. :)
Marked as helpful - @mroungouP@elyyyse
Hey, Malick - I think the error might be caused by a backwards greater than sign on line 48 of your .js file.
It’s currently written as
if (currentDate.getMonth() < birthDate.getMonth()) { ageMonths += 12; }, but I think you’re looking for inputs where the birthday has already occurred this year.I hope this helps! I found this challenge difficult and enjoyed reading through your solution.
- @ThatDevDiazP@elyyyse
Hey, Cesar - I also get a little flummoxed by the position property. I don't know much about Tailwind, but with plain CSS — the thing you want you want to stick in place (the button) needs to be
position: absolute, and the container you want to stick it to (the advice box) needs to beposition: relative.And then to get it to hang off the bottom of the box like it does in the design, you want to give the button a bottom of negative half the height of itself. So something like this:
container {
position: relative;
}

button {
position: absolute;
bottom: -30px;  /* assumes the button is 60px tall */
}
That
bottom: -30px;is saying, "stick to the bottom of the box, but move down 30px." A positive number would move it upward. So long as the button stays the same size, you shouldn't have problems with it moving around. I hope this helps!Marked as helpful - @RichusDP@elyyyse
Hey - this challenge really took me to task, it was fun to read-thru your completely different approach. I might have spotted the issue that's throwing your result off by a day.
In this
checkIfLeapYear();function, it looks like you're checking if next year (2024) is a leap year, rather than the year after the inputted birthdate. And since next year happens to be a leap year, you might be subtracting an extra day when this function runs.if (checkIfLeapYear(d2Year + 1) && sDays + eDays >= 366) { remDays = sDays + eDays - 366; d2Year++; } else if (!checkIfLeapYear(d2Year + 1) && sDays + eDays >= 365) { remDays = sDays + eDays - 365; d2Year++; } else { remDays = sDays + eDays; }Hope this helps! - E
Marked as helpful - @CJCameron13P@elyyyse
Hey, CJ - You're so close! If you run your
populateScore();function inside of your submitButton event listener, it should work. The way you have it running,score = document.querySelector(".number.selected").textContent;is looking for an element that's already hidden. - @KylePetriccaP@elyyyse
Hey, Kyle - I love how organized your code is, I should really get better at including comments like that. As far as improvements go, I believe the best practice is to build your
<form>— including radio inputs and submit button — in your HTML markup. And then simply grab the input's value and update the 'thank you' text with Javascript.That said, your approach was clearly intentional — I'm curious to know why you decided to create your form elements with JS?
Marked as helpful - @aaronpaulgzP@elyyyse
Hey, Aaron - This looks great! Looks like you just have a small syntax error. This is what you get back from the Advice API:
{"slip": { "id": 28, "advice": "When you're looking up at birds flying overhead, keep your mouth closed."}}So anywhere that you reference
.slip_idin your code, change it to.idand that should fix the problem.Marked as helpful - @RichusDP@elyyyse
Hey, @RichusD - Nice job with the transitions, that was a nice little something extra. On your two questions:
- You can correct the star tips being cut off by wrapping it in a
<div>and styling that. So something like:
<div id="star-design"> <img src="images/icon-star.svg"> </div> #star-design { // styles go here }- I see you have width set to 100% on the .card class. Are you saying it wouldn't respond to a pixel value? Happy to help, just not sure I understand the issue yet.
Marked as helpful - You can correct the star tips being cut off by wrapping it in a
- @NawalMalkiP@elyyyse
Hey, Nawal - Nice work! I made a pull request here, so you can see the few lines I added to grab the rating value and present it on the next card.
Basically, I selected the
<div class="rating">on the Thank You card and named itconfMsg. Then in yourchange()function, I assigned the value ofselectedDivto a variable and updated theconfMsgwith that. This solution breaks some of your styling, but hopefully it gets the point across.Next time, consider using
<label>tags instead of<div>s for your<input>s. That way, even when you hide the default styling withdisplay: none;, the<input>itself still gets selected when a user clicks on the styled<label>. Then you can take advantage of native functionality and use something likedocument.querySelector('input[type="checkbox"]:checked')to get the value. (I would also recommend radio buttons over checkboxes for this particular use case.)I hope this makes sense. Feel free to reply back with questions!
- @lucaspicininiP@elyyyse
Hey — great job on this! I noticed you made each rating input its own
<button>. If you use<input type="radio">instead and wrap them (and your submit button) in a<form>, you'll get some functionality for free and will have less JS to write. You probably learned more about the DOM doing it your way, though.Marked as helpful