Skip to content
  • Unlock Pro
  • Log in with GitHub
Profile
OverviewSolutions
0
Comments
67

Mike Hayden-Moore

@mickygingerLondon, UK1,005 points

Hello! 👋 I've been a professional web developer for about 12 years now, mostly full-stack. I was an instructor for 4 years teaching coding at a bootcamp in London, and now I'm the CTO and lead developer on Frontend Mentor! 🎉 I look forward to sharing my code knowledge with you!

Latest solutions

No solutions submitted yet.

Latest comments

  • Bankole Olanyi Sunday•30
    @VIFLO-BOS
    Submitted 4 months ago
    What are you most proud of, and what would you do differently next time?
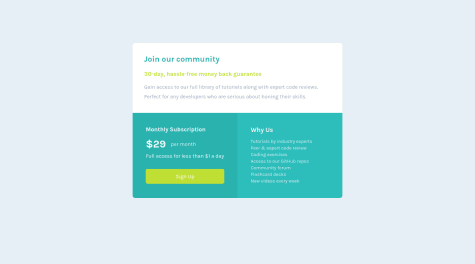
    About this project!

    Though it's simpler to compete it can be challenging at times am just lucky to have completed it on time!, but i believe this project opened my eyes to reality of going for more chanllenges

    what i learned?

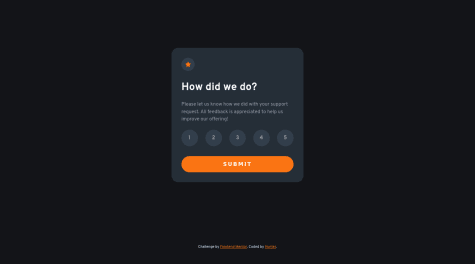
    i learn't how min-width & min-hight can be use for responsive component.

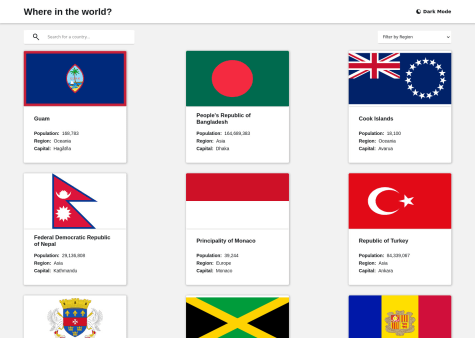
    What challenges did you encounter, and how did you overcome them?

    My challenges encountered are creating a reponsive component with grids without using frameworks

    What specific areas of your project would you like help with?

    Where I need Support!!

    I need support on how to implement this using react or Nextjs to make it functional

    how to create a reponsive component with grids without using frameworks

    Responsive qr-code-component using flex-box

    1
    Mike Hayden-Moore•1,005
    @mickyginger
    Posted 4 months ago

    Hi @VIFLO-BOS!

    Firstly I think you can remove the min-height from your .qr-container div, as that seems to be adding extra spacing at the bottom.

    I also think you can increase the border radius, and add a bit more padding at the bottom. The text in the p tag of the .qr-header-container div also seems a bit large.

    Aside from that you're using absolute positioning for your main div and padding to add space between the heading and p tags. I would generally favour using flex and gap to center and space elements on the page.

    If you're not familiar with flexbox, checkout Flexbox Froggy: https://flexboxfroggy.com/, and CSS Tricks great flexbox guide: https://css-tricks.com/snippets/css/a-guide-to-flexbox/

    I hope that helps!

    Marked as helpful
  • Anthony Nanfito•120
    @ananfito
    Submitted almost 3 years ago

    Mobile friendly solution using CSS flexbox

    #styled-components
    2
    Mike Hayden-Moore•1,005
    @mickyginger
    Posted almost 3 years ago

    Hi Antony!

    Firstly, this looks great, so well done!

    If you look at the accessibility report above you should see some improvements that you should consider best practice. You can click on the Learn more link for more info and directions on how to resolve these issues.

    Probably most important is to consider semantic markup when structuring your HTML.

    I would also favour using an absolute path eg: /images/image-qr-code.png over a relative path eg: ./images/image-qr-code.png for your image links. This can be a bit tricky when developing locally if you load your index.html file directly into the browser, rather than using a webserver and running you site on localhost.

    In any case I would recommend serving your files using a webserver on localhost in your development environment. Check out this StackOverflow post for more info on running your project on localhost.

    Hope that was helpful!

    Marked as helpful
  • Mauger•210
    @mauger1998
    Submitted almost 3 years ago

    First time EVER using javascript did alot of youtubing

    #accessibility#foundation#animation
    4
    Mike Hayden-Moore•1,005
    @mickyginger
    Posted almost 3 years ago

    Hey Mauger,

    This looks great! I think @Yavanha has left some great feedback above, but just to reiterate the most salient point: when you name a function you will overwrite an existing function of the same name:

    function hello() {
      console.log('hello');
    }
    
    function hello() {
       console.log('goodbye');
    }
    
    hello(); // this will log "goodbye" because the second function has overwritten the first
    

    There's loads of different approaches to this challenge but I think the way I would do it is to assign the textContent property of the button (ie the actual text inside the button), to a variable on click. Then you can display that in the popup.

    If you think about each HTML element as an object that you can interrogate (or get properties from), then you can write a function that asks the button that was clicked what its text content is and then append that to the popup. Something like this:

    <div class="numbers">
      <button>1</button>
      <button>2</button>
      <button>3</button>
      <button>4</button>
      <button>5</button>
    </div>
    <section class="popup">
      <div class="result">You selected ? out of 5</div>
    </section>
    
    const buttons = document.querySelectorAll('button'); // get ALL the buttons in one go
    const popup = document.querySelector('.popup');
    const result = document.querySelector('.result');
    
    function handleClick() {
      const selected = this.textContent // get the text content of the button that was clicked
      this.classList.add('clicked'); // `this` refers to the button that was clicked
      result.textContent = `You selected ${selected} out of 5` // update the text of the popup with the selected amount
      popup.classList.add('open-popup');
    }
    
    buttons.forEach(function(button) {
      button.addEventListener('click', handleClick); // assign the click handler to each button
    }
    

    I think this approach also means you can simplify your css a little. Here's a little more info on this in JavaScript. It's kinda nuanced and weird but very powerful! Don't expect to get it straight away, but simply put it refers to the thing that called the function. So for click events the button that was clicked, for scroll events the window that was scrolled, for keyup events, the key that was depressed...

    Oh, also you should use button and not div for the buttons. Firstly for semantic reasons but also for accessibility.

    Hopefully that helps. Let me know if you have any questions :)

  • Akshita 👩‍💻•340
    @Shanvie
    Submitted about 3 years ago

    Single price grid component

    #accessibility
    1
    Mike Hayden-Moore•1,005
    @mickyginger
    Posted about 3 years ago

    Hi Akshita, this looks great, well done.

    I think you just need to be award of the semantics of your HTML.

    You need to have one and only one h1 tag on your page. Looking at the design perhaps that should be Join our community.

    I think semantically "$29 per month" is a single element, and probably not a heading, so perhaps your should change your markup to something like:

    <p class="subscription__month">
      <span class="subscription__dollar">$29</span> per month
    </p>
    

    Hopefully that's helpful! :D

    Marked as helpful
  • RyanC•270
    @Co1eCas3
    Submitted about 3 years ago

    Countries API w/ SvelteKit

    #svelte
    1
    Mike Hayden-Moore•1,005
    @mickyginger
    Posted about 3 years ago

    Hey RyanC, this looks great!

    I'm not familiar with Svelte but checking localStorage, the countries-color-setting value never changes when you toggle dark mode.

    I think the problem might be on this line:

    if (darkModeSaved != null) darkModeSaved = darkModeSaved === 'true';
    

    The logic is quite complex because you're attempting to save the string values true and false in localStorage which are both truthy, and you also have to deal with null.

    I would instead use the 1 and 0, rather than 'true' and 'false'. I would also probably call the localStorage key something like isLightMode because it's a bit more idiomatic, and the default (or null value) would be dark mode on (or isLightMode: 0).

    This should make your toggle method a little easier to reason about:

    function toggleLightMode() {
      const isLightMode = +localStorage.getItem('isLightMode');
      localStorage.setItem('isLightMode', isLightMode ? 0 : 1);
    }
    

    You'll notice the "+" in front of localStorage that converts the value returned from getItem into a number, so '1' becomes 1, '0' becomes 0 and null also becomes '0'. This is called a unary operator.

    In the setItem method I'm using a turnary operator, this is basically an inline if / else statement. If isLightMode is truthy (ie not 0), then set isLightMode to 1 otherwise set it to 0.

    Now you should be able to make your load method a bit more terse... something like:

    export async function load() {
      if (!browser) return {};
    
      let isLightMode = +localStorage.getItem('isLightMode');
      let prefersDarkTheme = window.matchMedia('(prefers-color-scheme: dark)').matches;
    
      return {
        props: {
          darkModeEnabled: !isLightMode ?? prefersDarkTheme
        }
      };
    }
    
    Marked as helpful
  • Hunter•80
    @huntoor
    Submitted about 3 years ago

    JS DOM manipulation

    1
    Mike Hayden-Moore•1,005
    @mickyginger
    Posted about 3 years ago

    Hey Hunter this looks great!

    Since it's your first JS project, I thought I'd give you some feedback on your JavaScript.

    You've set out all your global variables at the top of the file, which is great, and initialized some sensible defaults. I think perhaps cardOne and cardTwo are not particularly descriptive variables, so I would probably recommend calling them ratingCard and successCard or similar. This helps to reason about the code.

    You've misspelled rating which is very minor, but is probably worth changing for clarity.

    Since 0 is falsey in JavaScript you can tidy up your submit button click handler a little:

    submitBtn.addEventListener("click", () => {
      if (!ratting) return error.classList.remove("hidden");
    
      selectedRatting.innerHTML = `You selected ${ratting} out of 5`;
      cardOne.classList.add("hidden");
      cardTwo.classList.remove("hidden");
    })
    

    The return keyword will prevent the rest of the function logic from running so you don't need an else clause in that case.

    You have named your removeActive function, but used anonymous arrow functions elsewhere. Personally I prefer named functions since you get more specific error messaging, and you can more easily add and remove event handlers that way. Something like:

     function handleSubmit() {
      if (!ratting) return error.classList.remove("hidden");
    
      selectedRatting.innerHTML = `You selected ${ratting} out of 5`;
      cardOne.classList.add("hidden");
      cardTwo.classList.remove("hidden");
    }
    
    submitBtn.addEventListener("click", handleSubmit)
    

    Finally you don't really need to use data attributes here because the value is stored as the text content of the button albeit a string, but that's quite easy to convert to a number:

    ratting = Number(rattingBtn.textContent); // or +rattingBtn.textContent
    

    It's worth mentioning these are all very minor style points and should be considered suggestions and not the "correct" way to write JavaScript. What you have written is easy to read, and is not overly complex in its solution, so very well done!

    Marked as helpful
View more comments

Stay up to datewith new challenges, featured solutions, selected articles, and our latest news

Frontend Mentor

  • Unlock Pro
  • Contact us
  • FAQs
  • Become a partner

Explore

  • Learning paths
  • Challenges
  • Solutions
  • Articles

Community

  • Discord
  • Guidelines

For companies

  • Hire developers
  • Train developers
© Frontend Mentor 2019 - 2025
  • Terms
  • Cookie Policy
  • Privacy Policy
  • License

Frontend Mentor for Teams

Frontend Mentor for Teams helps companies and schools onboard and train developers through project-based learning. Our industry-standard projects give developers hands-on experience tackling real coding problems, helping them master their craft.

If you work in a company or are a student in a coding school, feel free to share Frontend Mentor for Teams with your manager or instructor, as they may use it to help with your coding education.

Learn more

Oops! 😬

You need to be logged in before you can do that.

Log in with GitHub

Beta Member

This badge is a shoutout to the early members of our community. They've been around since the early days, putting up with (and reporting!) bugs and adjusting to big UX overhauls!

Oops! 😬

You need to be logged in before you can do that.

Log in with GitHub

Oops! 😬

You need to be logged in before you can do that.

Log in with GitHub

Oops! 😬

You need to be logged in before you can do that.

Log in with GitHub

Oops! 😬

You need to be logged in before you can do that.

Log in with GitHub

Oops! 😬

You need to be logged in before you can do that.

Log in with GitHub

Oops! 😬

You need to be logged in before you can do that.

Log in with GitHub

Oops! 😬

You need to be logged in before you can do that.

Log in with GitHub

Oops! 😬

You need to be logged in before you can do that.

Log in with GitHub

Oops! 😬

You need to be logged in before you can do that.

Log in with GitHub

Oops! 😬

You need to be logged in before you can do that.

Log in with GitHub

Oops! 😬

You need to be logged in before you can do that.

Log in with GitHub

Oops! 😬

You need to be logged in before you can do that.

Log in with GitHub

Oops! 😬

You need to be logged in before you can do that.

Log in with GitHub

Oops! 😬

You need to be logged in before you can do that.

Log in with GitHub

Oops! 😬

You need to be logged in before you can do that.

Log in with GitHub

Oops! 😬

You need to be logged in before you can do that.

Log in with GitHub

Oops! 😬

You need to be logged in before you can do that.

Log in with GitHub

Oops! 😬

You need to be logged in before you can do that.

Log in with GitHub