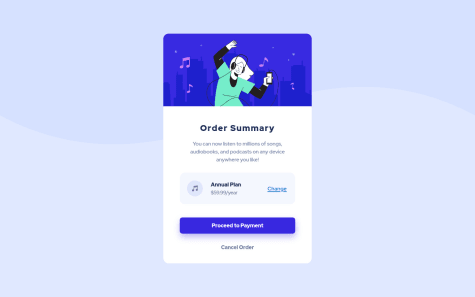
Not Found
Not Found
Not Found
Not Found
Not Found
Not Found
Not Found
Not Found
Not Found
Not Found
Not Found
Not Found
Not Found
Not Found
Not Found
Not Found
Not Found
Not Found
Not Found
Not Found

All comments

  • wxyzz22 160

    @wxyzz22

    Submitted

    Just completed another challenge! If you have any feedback(s) / suggestions / thoughts, I would love to know!

    REST API web app with React Router

    #react#react-router#fetch

    1

    P

    @GregLyons

    Posted

    Great work! You've completed quite a few complex projects recently. This one runs smoothly, and you handle state and asynchronous data fetching nicely.

    On your next project with asynchronous data fetching, I recommend reading this resource about handling loading and errors. That author also writes a custom hook to handle such things, which is good to read.

    A very good library for handling such things is React Query. In the example in that link you can see the useQuery hook similar to the first link. This library also handles a lot of other things for you, like caching (so you'd only need to do the "All countries" query once, and then when the user returns to that page it'll use the cached data instead of running the query again) and deduping (if you have multiple components on the page that call the same query at the same time, the query will only be done once, with its results being shared to both).

    One thing I would suggest for your code is to use more semantic HTML. In a lot of caes you're using <div> to contain text, whereas something like a heading <h1> (the "Where in the world?") or a <p> (for a lot of your other text) would be better. I think the best place to start would be the Text Content section of this MDN resource. I think that section's the most important (as well as "Forms"), and by practicing those two sections you would address a lot of the accessibility/HTML issues that Frontend Mentor is flagging.

    Marked as helpful

    2
  • P

    @GregLyons

    Posted

    Congrats on your first challenge! Your solution looks good. Here are some tips for future challenges:

    1. Consider using a CSS Reset. Many elements in HTML have some default styles applied to them, like some top/bottom margin on <p> tags. In this case, those margins end up being in line with the design, but oftentimes you may find yourself struggling to remove a lot of default stylings to get your work to look more like the design. A CSS Reset like the one above should alleviate this, and give other more sensible defaults to start from.
    2. Your card wrapper has a width: 20%. This looks good on larger screens, but as you shrink the screen horizontally the card gets too narrow too quickly. Something like minmax or clamp are helpful to give a minimum and maximum width for your content, which will make your designs more responsive.

    Good work again, and best of luck on future challenges!

    Marked as helpful

    0
  • P

    @GregLyons

    Posted

    Good work! You're using semantic HTML (<h1> for heading, <p> for body text), which is all you need in terms of accessibility for this challenge.

    I'll give you a few pointers I keep in mind when thinking about accessibility. Since this is your first challenge, I can't really assess what you know in terms of accessibility, so forgive me if I'm saying things you already know. My tips will mainly revolve around using semantic HTML, which is the idea of writing your HTML in a way that can be more easily understood by machines (e.g. screen readers for human comprehension, search engine crawlers for SEO, etc.).

    1) Headings Semantically, <h1>-<h6> elements denote sections on your web page. You should have precisely one <h1> on any given web page, which serves as its title. Then, your heading levels should decrease by one. That is, the heading of every section thereafter should have an <h2>, the subsections of those sections should have <h3> headings, and so on. A common mistake is that people will look at the appearance of a heading in a design, and assign it to <h3> or <h4> based on that, when semantically (i.e. the meaning), the heading introduces a main section of the page; in this case, it should actually be an <h2>. Remember that you can always style headings as you desire, so the HTML (i.e. which heading element) you use should reflect the meaning of the heading on the page, not the visual design you've been given.

    Another reason this is useful is that a lot of screen readers allow users to navigate the page by going to different landmark elements. For example, they can go to the next <h2>, or the next <h3>, etc. Thus, if two sections are the same level in the logic of the document, you should give them the same heading level (even if the headings are styled differently).

    2) ARIA roles To help screen readers understand your web page, there are many different attributes like aria-*, e.g. aria-role. For example, if you put an aria-role="button" on a <div>, screen readers will interpret the <div> as a button, which then indicates to the user, who may have trouble/may not be able to see your web page, that they can press it. Without this role, there's no indication (aside maybe visual indication) that the <div> can be interacted with.

    The thing is, different HTML elements have certain aria-* properties by default. For example, a <button> element already has aria-role="button" built in, so screen readers will interpret as a button without you needing to remember to add the appropriate ARIA role! Thus, using semantic HTML makes it a lot easier to make your websites accessible.

    3) Lists Think about which content on your page is semantically a list. For example, in a lot of Frontend Mentor challenges, you'll see a series of cards on the landing page describing the features of a product. I like to make these into lists using <ul> for the parent container and <li> for the individual cards, instead of using <div>s in either case. Why? Well, the <ul> now gets aria-role="list" automatically, and each <li> gets aria-role="listitem", so screen readers can now interpret these cards as a list, which is what they are semantically: a list of features for your product.

    Another neat things is that, upon entering the list, screen readers will signal to the user that they're entering a list, and it'll even tell them the number of items. Imagine instead that you have a list of <p> tags for the features of a product. A screen reader would read them one after the other, without telling the user its a list. This leads to confusion (imagine you're being read the words aloud without any breaks between items), and using an unordered/ordered list prevents this.

    I hope this helps! If so, feel free to mark this comment as helpful. Either way, I hope these pointers will help you write more accessible web pages. Best of luck in your future projects!

    Marked as helpful

    1
  • P

    @GregLyons

    Submitted

    It was a bit tricky styling the inputs at first, as I wanted to use <input type="radio"> rather than <button>s. Let me know if there's a simple way to accomplish the design (while still using `<input type="radio">, which I feel is the most semantic element for the task). Any other feedback also welcome.

    Learning Tailwind 3

    #tailwind-css

    1

    P

    @GregLyons

    Posted

    (Doesn't look like I can edit my solution question, so I'll post a comment instead.)

    For some reason it says "SUBMIT QUERY" on the button in the Frontend Mentor screenshot for my solution, but when I go to the site link it just says "SUBMIT". Also, I don't have the word "query" anywhere in my source code. If anyone knows what this could be, let me know!

    0
  • @PhisherFTW

    Submitted

    I found, the transition when hovering over the image difficult, it took me several attempts and a lot of looking up on StackOverflow, although I finally got a working solution. I am still not a 100% sure exactly how it works, and I wouldn't be able to reproduce it from memory. Please if you have any recommendations to simplify and make my code better let me know.

    P

    @GregLyons

    Posted

    Good work!

    I actually think your solution to the tricky image-hovering problem is pretty good. When you say you're not entirely sure how it works, is it the CSS that you wrote that you're having trouble understanding? The hover effect is achieved using the :hover selector. The key is your two rules:

    .container:hover .image-equil {
    opacity: 0.3;
    }
    
    .container:hover .middle {
    opacity: 1;
    }
    

    The rules are stating the following:

    1. When .container is being hovered, reduce the opacity of any of its .image-equil descendants.
    2. When .container is being hovered, increase the opacity of .middle (which is otherwise at 0) to 1.

    I believe what's happening here is this: the background of .container is that teal color, so when you reduce the opacity of .image-equil--which is taking up all of .container, the background color shows through (Rule 1). Then, the content of .middle consists of the eye image (which you've centered using CSS), and when hovering the eye becomes fully opaque, and actually blocks the portion of the .image-equil that is under the eye image (Rule 2). This is the desired effect, as you don't want to see the NFT image through the white eye (according to the design).

    I don't think it's necessary to have the .middle <div>, as you already have the .middle class on the eye <img> itself, so even without the <div> it'll still be a descendant of .container, and Rule 2 will apply to it. Other than that, I don't see much way to simplify your image hovering thing.

    Two more things I want to point out:

    1) For the author name "Jules Wyvern", you have a separate <p>, which you set to display: inline; so that it'll be on the same line as "Creation of". There's already a specific HTML element for what you're trying to do there, however: the <span>. Using a <span>, you'd have

    <p class="creator">Creation of <span class="name">Jules Wyvern</span></p>
    

    Since <span>s are inline elements, there's no need to change the display property in that case. This is also better since, if you think about the problem in terms of what the HTML elements you have are saying, they're indicating that "Creation of" and "Jules Wyvern" are in separate paragraphs, which is not what you're trying to convey. Instead, you want "Creation of Jules Wyvern" to be a single paragraph <p>, and then you can change text within that paragraph using a <span>.

    2) When you feel ready, I recommend learning Flexbox as soon as you can. It'll make solving these UI/layout challenges a lot easier. For example, your CSS:

    .eth-txt {
        position: relative;
        display: inline;
        width: 2rem;
        padding-right: 3.25rem;
        color: hsl(178, 100%, 50%);
    }
    .days-left {
        display: inline;
        position: relative;
        width: 2rem;
        color: hsl(215, 51%, 70%);
    }
    

    which you use to position the ETH text and days left, only works for the very specific width of the box. If the width of the .card-body element were to change at all, suddenly your padding-right on the .eth-text would no longer make it look like the two pieces of text are on opposite sides of the same line.

    A more robust (i.e. works at any screen size/container size) would be to put your .eth-text and .days-left in a wrapper <div class="wrapper"> with

    /* Selects the .wrapper <div> */
    .wrapper {
      /* Turns .wrapper into a Flex container */
      display: flex;
    
      /* Direct children of .wrapper placed on opposite sides/spaced out evenly up to the edges */
      justify-content: space-between;
    }
    

    (Note that you'd need to put the ETH icon in the same block as .eth-text to make this work--but this would be the solution without the icon.)

    I hope this helps. If so, feel free to mark this comment as helpful. Either way, best of luck in your future projects!

    2
  • @zambobence

    Submitted

    I found it quite challenging to position the profile picture in the middle, at the end I have decided to position it absolutely. I am very interested if there are any more dynamic ways to position it.

    I could not figure out how to set the background of the body so I just used a gradient, although aI would really like to know the solution for that.

    P

    @GregLyons

    Posted

    Good work on using semantic HTML. Here's what I think you can do for the profile picture.

    First, I'll point out then when I try to adjust the height on my computer, the alignment gets messed up, and the profile pic is no longer properly centered. I believe this is because of a height/margin mismatch between your .card-top, height: 20vh; and your .profile_pic, top: 23%; properties. The issue is that the 23% refers to 23% of the .card height, whereas the 20vh refers to the screen itself. The former depends on the content of the card, whereas the latter depends solely on the viewport height. I'd recommend changing the .card-top height to some sort of percentage instead, so that it depends on the height of your actual content itself. This'll prevent this weird behavior where things get out of alignment.

    As for positioning the profile pic, I'd still use absolute positioning, but in a different way:

    1) Re-work HTML Put your .profile-pic <img> inside your .card-top <div>, and put position: relative; on .card-top instead of on .card. This is so that you can position .profile-pic relative to the .card-top instead of .card.

    2) Center horizontally Check out thgaskell's answer, as it has some good info on left/right vs. margin-left/margin-right. You may need to explicitly set the width of your element in this case. If you don't want to specify the width (it's not always desirable to do so), check out Adel's answer instead.

    3) Position vertically This is where setting position: absolute; on .card-top instead of .card pays off. You want .profile-pic to align with the bottom of .card-top, which you can easily do with bottom: 0; (on .profile-pic). Then you need to push .profile-pic down a bit more so that its centerline aligns with the bottom edge of .card-top. For that, you can add transform: translateY(50%); to do the trick. Here, note that the "50%" in the translateY refers to 50% the height of .profile-pic, NOT that of .card-top (this is different behavior than, e.g. height: 50%).

    This solves your responsivity issue (where the profile pic gets misaligned on different screen heights), because you're now binding the positioning of .profile-pic to the bottom edge of .card-top, instead of binding it to the top of .card and then doing some percentage math to get the result on a particular screen size (a calculation which is very tricky and probably not stable across different screen sizes).

    Hope this helps, and best of luck in your future projects!

    Marked as helpful

    0
  • P

    @GregLyons

    Posted

    It looks like all of your HTML, CSS, and JavaScript is pretty solid. Nice!

    The one thing I'd suggest changing would be to put the rating numbers in <button> elements. Right now, the user can only fill out your form with a mouse, since they can't focus the ratings to select them. While you could make the <li> elements themselves focusable, you'd have to worry about other things like making sure the Enter key also selects the rating using another event listener, and so on. Instead, the <button> element is focusable by default, and pressing Enter activates the click event, so it's a lot easier to work with. Doing this would make your website more accessible, not just for users who can't use a mouse, but also for users who prefer to use a mouse.

    As I mentioned before your JavaScript is good, but since you said that you're learning to write JS, let me give you a tip that you may want to consider for future projects:

    If, instead of passing an anonymous callback function into addEventListener, you first define a function beforehand and then pass in that function to addEventListener, it then makes it easier for you to remove the event listener in the future when necessary, like so:

    const handler = function(e) {
      ...
    };
    
    document.addEventListener("...", handler);
    
    ...
    
    document.removeEventListener("...", handler);
    

    In other words, you can just pass in the name of the function to removeEventListener. See Adam Heath's answer on this StackOverflow post for more details.

    Obviously you don't need to do that in this challenge, but you'll likely find that you need to remove an event listener at some point in the future.

    Marked as helpful

    0
  • @catasistemas

    Submitted

    Hi everyone! This is my first frontendmentor challenge.

    i would hope get any feedback. Thanks

    P

    @GregLyons

    Posted

    Nice work! It looks you have a pretty good grasp of semantic HTML, as well as Flexbox. I have a couple notes on your CSS:

    Are you deliberately using box-sizing: content-box; (at the top of your CSS)? I believe that's the default behavior, so you shouldn't need to declare it. On the other hand, a lot of developers (myself included) prefer box-sizing: border-box;. For a lot of people, it makes reasoning about widths and heights easier, as margins and padding are factored into any specified width/height, as opposed to applied in addition to (and hence changing) the specified width/height. If you don't know about that, you may want to try it out. If you prefer content-box instead, though, then by all means keep using it.

    The other thing I'll mention is that your height: 100vh; rule on the <body> suffices to center your content vertically, but just in case for your future apps/web pages, min-height: 100vh; is more robust. In the case of your solution it wouldn't change anything, but it would allow the height of the <body> to increase to contain additional content.

    In general, you don't want to explicitly set the height of an element (unless, for example, you're trying to get some exact positioning), as different users' browsers have different font-size preferences. So even if your content fits into your element with an explicit height, these different font-sizes might cause the text to overflow your element on the user-end. Using min-height allows you to set your desired height, while still allowing for overflow (e.g. the background of the <div> would grow to contain the overflowing content in my above example). You may already know this and are just using height: 100vh; since in this challenge it won't cause any ill-effects, but I wanted to point this out just in case.

    Hope this helps. If so, feel free to Mark this comment as Helpful. Either way, good luck on your future projects!

    0
  • P

    @GregLyons

    Posted

    Good work! Here are some tips on aligning things horizontally:

    margin: auto; can work to center content horizontally, but it also applies to the top and bottom margins as well, as it is a shorthand property for (in order): margin-top, margin-right, margin-bottom, and margin-left. This can be a problem if you don't want to set margin-top/margin-bottom to those values. Thus, using either

    margin-left: auto;
    margin-right: auto;
    

    or

    margin-inline: auto;
    

    is preferable.

    Using margins often requires you to explicitly set the width of an element, which you may not want (especially for responsive design). Flexbox gives you a more robust way to horizontally center content. On the parent element of the children you want to center, apply

    display: flex;
    justify-content: center;
    

    To center your card (.whitebox), for example, you could put the above code on the <body>. Usually you'll probably need to space out the children (e.g. with the gap property), as they'll be put next to each other horizontally. Another solution that avoids this, again using Flexbox, is

    display: flex;
    flex-direction: column;
    align-items: center;
    

    Of course, if you want your Flex children to be in a row, you can't use flex-direction: column;. You can learn more about Flexbox here. I recommend you learn it, as it's very useful. You don't need to understand everything right away; you'll master it through using it in your future projects.

    The other tip I'd give is to work on using semantic HTML. That includes using header elements (<h1>-<h6>) for your headers, <p> elements for your text, and so on. This makes your web page more understandable to search engines (for SEO purposes) and screen readers (for accessibility). In your solution, I'd say your .text is an <h1> or an <h2> (every page should have an <h1> element, so probably the former; but if this component were placed in a larger context it'd probably be a lower-level heading), and your .text2 is a <p>.

    Using semantic HTML is also very important for forms and buttons, not just for the above reasons, but also because the <button>, <input>, etc. elements have a lot of keyboard functionality built-in by default. If you were to just use <div>s instead, you would have to code all that keyboard functionality yourself (or give it up altogether, which wouldn't be acceptable for most sites).

    I hope that helps. If so, feel free to Mark this comment as Helpful. Either way, good job again, and best of luck on your future projects!

    Marked as helpful

    0
  • @jmblack15

    Submitted

    Hello everyone!

    please let me know how I did, and any feedback is welcome, I would also like you to share any resources to learn how to manipulate the DOM

    Thank you very much!

    Interactive rating component

    #accessibility#lighthouse

    2

    P

    @GregLyons

    Posted

    Based on your solution--which works well, by the way--it looks like you have a pretty good grasp of basic DOM manipulations, so good job there. I don't have a single resource that I used to learn DOM manipulations (and part of the reasons I'm doing these challenges is to learn how to manipulate the DOM with vanilla JS instead of using something like React). It looks like this is a good source, but the approach I'm taking right now is to get in practice through these challenges and Google whatever I need as I go. I find that I know enough about what can be done with the DOM so that I know what to Google when I need help.

    I'd say you have a pretty good foundation with all the functions you used here (selecting DOM elements by classes, IDs, etc., adding event listeners), so that in the future if you want to do something you (e.g. listen for a particular event) but don't know the syntax, you could Google, e.g. "javascript listen for <type of event> event" or something like that.

    Another couple notes I have are on your HTML/CSS:

    1) Whenever you use a <section> element, you need an <h1>-<h6> element somewhere within (probably not an <h1> since you really should only have one of those per page); the first such heading element within the <section> will be the name of that section for screen readers and other technologies that are trying to understand your page. For your case, I'd say that "Thank you!" is an appropriate header (<h2> or even <h1> since there's no other <h1> on the page).

    2) Aside from the last point, I'd say you're doing a pretty good job using semantic HTML. I do feel like you're using a bit too many <div>'s though, specifically in your card-state section. It looks like you're using, e.g. .card-container-selected to apply background-color, border-radius, and centering, but that's not really necessary. Since your <p>, .card-state-selected, is already a block element, you can apply the background color and border radius directly to that using CSS.

    Also, in this rule:

    .card-ranking,
    .card-state {
      width          : 100%;
      height         : 100%;
      display        : flex;
      flex-direction : column;
      justify-content: space-between;
    }
    

    if you added an align-items: center;, this would horizontally center the content (horizontally because of flex-direction: column;), and should achieve what you're trying to do with the various place-content: center; and text-align: center; rules. This rule on the flex parent (your main wrapper for each component) would horizontally center its children. Thus, you don't need the wrapper <div>'s around your <p> elements to center them. Writing less CSS/simpler HTML to achieve the same thing in this way will save you a lot of headaches in the long run, especially on larger-scale projects. Of course, sometimes wrapper <div>s are necessary for styling so you should still keep that tool, but in this case they aren't.

    Hope this helps!

    Marked as helpful

    1
  • @geoffreyhach

    Submitted

    No particular issues, i learned the basic of the fetch method with and API. Still a lot to learn, the "then" method is still a bit obscur for me.

    P

    @GregLyons

    Posted

    Nice job! You're using fetch just fine here. I found asynchronous JS pretty tricky for awhile. You might find Sid's answer to this StackExchange question informative, as it's a pretty comprehensive answer. His breakdown of the Promise API (steps 1-6) is especially helpful.

    You might also find async/await syntax more intuitive, which I use in my solution. It lets you, for example, assign the results of the asynchronous action to a variable in a "synchronous" looking manner. From my code:

    **async** function getAdvice() {
      const { id, advice, } = **await** fetch('https://api.adviceslip.com/advice')
        .then(res => res.json())
        .then(data => data.slip);
      ...
      ... (DOM stuff with my variables)
      ...
    

    (Note that I'm using object unpacking to get the id and advice properties from data.slip.) Essentially, I'm able to store the returned value of the last then statement into variables. Using await means that my code won't go forward until the asynchronous action is complete. Without the await, what's returned would just be a Promise, not an object with id and advice attributes, and I couldn't use those variables.

    To be clear, your solution is also completely correct/understandable. I just wanted to point out this new syntax since a lot of people find it easier to wrap their head around than the old methods of asynchronous programming. You might prefer Promise/then instead, and even if not, you'd still need to understand them a bit to use async/await.

    One last thing I'll talk about is that your has a couple pesky scrollbars, even though they aren't necessary. They're not a big deal in this case, but they could be annoying in your future projects. Here's how you can get rid of them:

    The vertical scrollbar

    You set your <main> to have height: 100vh;, presumably to center your card vertically. Then, when you add your <footer>, this is additional content, so that the total space is greater than 100vh, hence the vertical scrolling. Centering things vertically is pretty tricky, and I can't think of a simple solution here. Where I would start would be putting height: 100vh on the <body> instead of the <main> (actually min-height: 100vh;; using height: 100vh would be bad practice since it could mess up when content actually does overflow the screen vertically) and then do some sort of positioning to get your footer at the bottom. (Maybe you could align-self it with Flex?) This article gives some helpful information on centering things vertically, though it doesn't cover your exact use case.

    Anyway, that's where the vertical scroll bar is coming from.

    The horizontal scrollbar

    I believe this is because you're setting width: 100vw; on your main. I believe you're doing this to center the content horizontally, but I don't believe it should be necessary, as block elements (such as <div> and <p>) take up all the available horizontal space. I believe <main> is such an element, so it should already be taking up the width of the screen. I believe what's causing the horizontal scrollbar is that your vertical scrollbar from the previous point is adding on a bit of width to the page, so the width of your page is actually 100vw plus the width of the vertical scrollbar. That causes horizontal overflow.

    I think removing width: 100vw; should fix this. In the future, when you do want scrolling but don't want it to mess with the width, you could use something like overflow-y: overlay;. This will make it cover any content below it though, so keep that in mind.

    Hope this helps!

    Marked as helpful

    2
  • Ciceron 940

    @MarcusTuliusCiceron

    Submitted

    I couldn't find webkit property to make the past part of the slider change color, so it is working only for firefox. Does anyone know how to style this for webkit based browser ?

    It make me so mad i did not even complete the mobile style :D

    P

    @GregLyons

    Posted

    Ahh I gave up on this challenge because I got so frustrated trying to style the slider. I couldn't figure out how to get the left part filled in, while having the right-hand part be not filled in (with only HTML/CSS).

    Seeing this I remember that I actually had built a slider in a React project I worked on (so not pure HTML/CSS). I was following this tutorial for a double slider, and adapted it to make a single slider. Adapting that post to a single slider and in HTML/CSS/JS context, essentially, you have an HTML set-up like this:

    <div class="slider__wrapper">
      <input type="range" class="slider__thumb">
      <div class="slider">
        <div class="slider__track" />
        <div class="slider__range" id="range" />
      </div>
    </div>
    

    Then you would use CSS to

    1. Remove the background from the <input>, so that only the thumb is visible (hence the class name slider__thumb);
    2. Use slider__track as your basic background (the gray, empty one), and slider__range as your filled-in background (the green one);
    3. Use position: relative; on slider__wrapper so that you can position: absolute; slider__thumb and slider to center them properly.

    Finally, you would use JS to manipulate the width of slider__range based on the value of the input. So if the input value is 1 and the max is 5, then slider__range should have width: 20%;. This makes it so that changing the value of the input changes the width of the background slider__range, which should achieve the desired effect. (Also, you may need to set some z-indexs to get it to look right.)

    It's pretty complicated, all to just to get the background of the slider to be two colors instead of one... I hope that all makes sense. I'd love to see a simpler/pure CSS solution though, as this challenge is marked as HTML/CSS only.

    Marked as helpful

    0
  • Clara Wen 320

    @clarafuwen

    Submitted

    Hello! I just started to learn HTML & CSS basics, and this is my first HTML & CSS project.

    I was wondering if there's a better way to position 'attribution' div under the 'container' div. There're only two main divs inside the body -- 'container' and 'attribution.' I managed to doing it by setting

    'position: absolute' 'bottom: 8vh'

    The problem of this setup is when resizing the web page, when the height is shortened, the attribution will touch and overlap the screen since its position is set according to the bottom. However, what I wanted to do is to set 'attribution' position below the 'container'/screen , relative to the container not to the web page.

    Also, I feel that I used too many divs in the index.html, not sure if this is the best practice in terms of HTML semantics. Same goes for class selectors in styles.css.

    I'm in the process of picking up the HTML&CSS basics from online tutorials, so any feedback will be appreciated.

    P

    @GregLyons

    Posted

    Good solution! I don't actually think you're overusing <div>s, and your HTML is pretty semantic (using <p>s and headings). It looks like you have a few HTML warning/errors according to the report. You can read those and take them into consideration, but the two that stood at the most to me were

    1) You have an <h2> and an <h4> but no <h3> in between ("Heading levels should only increase by one"). The differences in numbers aren't so much for styles but rather for indicating sub-sections/logical organization of the document. In this case, you using an <h4> is saying that it belongs to a "sub-sub-section" of the Order Summary (the <h2>), when really it's a sub-section.

    2) You're nesting an <a> in a <button> ("Interactive controls must not be nested"). I can see where you're coming from with this since it's a button on the form, but they also take the user to new content. I think the "Change" button should just be a <button> (no <a>), as I imagine it just popping up a modal for the user to select a different plan. That's up to interpretation though, maybe it would just be an <a>... For the submit button, there are a few different options, which you can see in Sean Vieira's answer here.

    As for your positioning issue, I don't think you'll be able to make the attribution not go over the main card using position: absolute, as that removes the attribution from the flow of the document. This means that it won't be affected by any margins you put on the main card. I see that you're also using absolute positioning to center the card on the page. You didn't mention that as an issue, but I think understanding this will make it easier to position your attribution, so bear with me here.

    You can easily center the card horizontally by styling the <body>/<div> containing it with

    display: flex;
    justify-content: center;
    

    but using align-items: center; probably won't get it just right for you. The issue is that the height of the <body> depends on its content. Right now on your web page it's actually 0 if you inspect it, since you absolutely positioned your content. Were you to remove position: absolute; from your elements, the height of the <body> would increase to contain them, but it still wouldn't be the full height of the page. Thus, if you were to use align-items: center;, then it would center the content relative to the height of the <body> (i.e. not the viewport height). You would want a min-height: 100vh on your body to make its height take up the entire screen. You can read more about this here. The articles on that website are a bit more intermediate level, but you could probably still learn a lot from reading it.

    That gives you another way to center your card, but how does it help with your attribution issue? Well, now your card is part of the flow of the document, so elements can be positioned around it (you should've taken off position: absolute from the card if you're using the method above). If you take position: absolute off the attribution, then it can be pushed down by the margin-bottom of the card. So, if you do something like

    .container {
      margin-bottom: 40px
    }
    

    and remove position: absolute from both elements, then the attribution should be pushed away from the card, as you like.

    Hope this helps! If so, feel free to mark this post as helpful. Best of luck in your learning!

    Marked as helpful

    0
  • Suprefuner 470

    @Suprefuner

    Submitted

    Hi All,

    After some good comments I did some amendment, please check and please let me know if there is anything else I should change!!! Thanks so much!

    P

    @GregLyons

    Posted

    Looks good, and cool to hear that you took the time to update it after receiving feedback! I have a couple suggestions as well:

    1) It's subtle, but there's actually a separate divider for mobile and for desktop (your divider line looks a lot smaller in desktop mode than in the design). One thing I learned yesterday (shout out to @isprutfromua was that you can use a <picture> element to change which image is displayed based on the viewport width. Read this for more info. I find that a lot of these Frontend Mentor challenges change the image based on the viewport dimensions, which is quite common and also precisely what this <picture> element is for.

    2) I see you put your :hover pseudoselector in a media query. I'm assuming you intend for the :hover to not activate on mobile/touch screen devices. That's actually something I haven't thought about before, and after reading a little bit it does seem like having :hover states on touch devices can be a bit disruptive. I feel like, though, that it's a bit dangerous to just use min-width: 50rem to detect this. I found the answers to this StackExchange question to be pretty helpful. It looks like you could use different properties in your media queries than just the width.

    I hope this helps!

    Marked as helpful

    0
  • @mukherjee-ayan

    Submitted

    I was not able to center the component vertically. If you have any suggestion regarding this or any other suggestions, please feel free to add it in the comment section. Thanks in advance.

    P

    @GregLyons

    Posted

    I find centering an element vertically on the entire screen pretty tricky, since the

    display: flex;
    align-items: center;
    

    method only centers it within the height of the element. If you were to apply these two rules to, say, the <body>, you wouldn't get the vertical centering since, if you inspect the <body>, you can see that its height is only that of the content (even though the entire background color changes). One solution could be to set the min-height of the <body> to 100vh (you generally don't want to explicitly set the height of an element, however, so we use min-height). This article goes a lot more in-depth on this. I've been reading the articles on that site and found them quite helpful!

    Hope this helps.

    0
  • myrdin 80

    @myrdn

    Submitted

    Here is my solution for the challenge.

    I wonder which html element is the best to use for the ratings. I choose button, it makes it keyboard accessible but not sure about the semantic. Feedback welcome and happy coding !

    P

    @GregLyons

    Posted

    I think <button> elements are acceptable in this case, precisely because it makes it more keyboard accessible as you say. It's definitely better than using something that's not inherently keyboard-focusable like a <div>. However I believe the most semantic HTML element would be an <input type="radio"> since that's precisely what the rating system is. Then, you can allow even more keyboard controls (arrow keys, I believe) by grouping them using a <fieldset> element (which you can style like a <div>). See this link for more information. This is probably best since you want your elements to be semantically grouped as well, and I'm not sure whether a <div> accomplishes that. It's pretty tricky to style the radio inputs to look like the design, though--I myself haven't fully learned it--whereas with <button>'s it's a lot easier.

    Also, if you use a <fieldset> you should add a <legend> heading as well. Then you'd need to remove the outline on the <fieldset> (you can see it in the examples in the above link) and make the <legend> hidden to be in-line with the given design. Read this for a useful way to make form labels visually hidden but still accessible via screen readers (the latter of which display: none; doesn't achieve).

    Another example of this grouping would be with <ul> and <li> elements; when screen readers encounter a <ul> element, they'll even read of the number of list items in the list based on the number of <li>'s. This wouldn't happen by making a list of <p> elements wrapped by a <div>, for example.

    Hope this helps, and good job!

    Marked as helpful

    2
  • P

    @GregLyons

    Posted

    I like the use of flex in your media query; that's something I need to work on more. Here are a couple suggestions I have:

    1) You do a pretty good job of using semantic HTML, but I think in your "Why Us" section you should be using a <ul> instead of a series of <p>'s. While stylistically it looks the same, it's important for accessibility. Specifically, when you use <ul> with <li>'s, screen readers will indicate to the user that they've encountered a list, and it will even tell them the number of items. Whereas I can tell visually from your design that the features are in a list, if I were only having the content read to me I might be confused since I would just hear a series of incomplete sentences; it might take a few seconds before I realize I'm being told a list.

    In this particular case you'd need to remove some styling from the <ul> and the <li>'s (I always need to look up the rules for that...), but I believe that's also good practice since it helps you learn more about styling lists.

    2) This may be more of an opinion I have, but I think some of your CSS selectors are unnecessarily specific, e.g. .col_1 .money_back, .col_2 .sub_plan, .col_2 .price. On the one hand, it can prevent the styling there from leaking out to elements in different contexts using those classes. On the other hand, it makes refactoring harder since if you were ever to change the .col_1 or .col_2 class names, or to move the .price, .money_back, or .sub_plan elements out from the columns, then those rules would no longer apply. Thus, it may be better to use the second part of your selectors (i.e. without the column part) in each rule. I found that using BEM naming conventions was helpful, but other CSS naming conventions (like CUBE CSS) also help alleviate this issue.

    Hope this helps!

    Marked as helpful

    0
  • P

    @GregLyons

    Posted

    Looks like everything's working properly, and I like how you make the submission button disabled until the user selects a rating; I don't think that was in the challenge itself, so it's a good catch. I have a few suggestions as well:

    1) You should be using semantic HTML (<h1>-<h6> tags, <p>, <button>) instead of <div>'s whenever applicable. This makes your website easier to understand for screen readers and SEO. One example is that your rating buttons should actually be <button> elements instead of <div>'s. Another benefit of this is that users can then use "Tab" and "Shift + Tab" to go through the ratings with a keyboard. Some people physically have trouble using computer mice and need to use a keyboard, whereas others (like myself sometimes) just prefer to use keyboards sometimes for filling out forms (like tabbing between input fields). This behavior is built into <button> and <input> elements and so doesn't require much more work on your end (as long as you remember to do it), but it would be quite hard to code for <div> elements. Using semantic HTML lets you leverage a lot of built-in stuff to make your websites even better without doing more than choosing the correct element.

    2) I believe display: none; applies not only to the element, but to its children as well. This would help you not have to apply your .non-display class to elements one-by-one like you do in your JavaScript. For this to work, you could take your .summary, .thakyou-title, and .thankyou-para elements in wrap them in a <div>, with a class like .thankyou-wrapper. Then, you could wrap the other elements (your initial component with the rating feature) in another <div>, with a class like .rating-wrapper. Then you can just add/remove the .non-display class on those two wrapper <div>'s.

    3) You can read more about display: none; here. Near the middle of the page, you can see that with display: none;, your page will be displayed as if the element isn't there. Thus, these rules in your .non-display class:

    margin: none;
    border: none;
    width: none;
    height: none;
    

    aren't necessary/don't do anything, as your element isn't taking up space when it has display: none;. They would be relevant if you used visibility: hidden; instead, in which case the element disappears but still takes up space, but in that case you may as well just use display: none; in the first place.

    Hope this helps!

    Marked as helpful

    0
  • P

    @GregLyons

    Posted

    Everything works well, and your design matches, so good job there. I have a few suggestions for your code.

    1) I mentioned in a comment on another one of your solutions that should be using semantic HTML (for accessibility and SEO reasons). This is a case where it becomes pretty important: your rating numbers and submission button should be <button> elements instead of <div>'s. Even though someone using a mouse wouldn't tell the difference, it's not possible to use your form with a keyboard. This is because I'm not able to focus on the interactive elements of your page using the "Tab" key. Some people need to use keyboards rather than a computer mouse to navigate the web, whereas others just prefer to use them on forms (like when filling out credit card info on a to-go app, I like to tab between the fields instead of clicking).

    Another nice thing about using semantic HTML (e.g. <button>'s instead of <div>'s), is that you don't actually need to code any support for tabbing. On the one hand, you could use JavaScript to allow the user to tab between your <div>'s, but that would be quite complicated. Instead, if you use <button> elements, that behavior is already built-in. Thus, you're able to make your web page a lot more interactive without much more effort.

    2) You have a couple resets at the top of your CSS file:

    *, :active, :focus {
        outline: none!important;
    }
    *, :after, :before {
        box-sizing: border-box;
    }
    

    The second one, the box-sizing: border-box;, is one I use all the time. You should be careful with the first one that removes the outline on button elements, however. For one, I don't believe it actually applies to your solution, since you aren't using elements which can be focused (and thus have the :focus pseudo-selector). More importantly, it can make your website harder to use. Were you to use <button> elements like I suggest in my first point, then this reset would mean that users couldn't actually see (or at least would have trouble seeing) which button which button was selected, because the outline is what indicates which element is focused.

    I myself like to apply custom styling to my <input>'s and <button>'s, and sometimes prefer to turn the outline off. However, it's very important then that you add some sort of replacement styling. E.g. in your

    .submit:hover {
        color: var(--Orange);
        background-color: #fff;
    }
    

    rule, you could also add a .submit:focus selector:

    .submit:hover,
    .submit:focus {
        color: var(--Orange);
        background-color: #fff;
    }
    

    which could be a suitable replacement. Sometimes, if you're adding a :hover effect to a button, adding a :focus selector onto the rule can be an acceptable replacement to removing the outline, but not always.

    3) Your JavaScript, while perfectly functional, has a lot of repetition. Here are some tools you could use to cut down on it:

    • You could use document.querySelectorAll(".circle-icon") to select all your numbers at once, and store them in an array. I believe they should be stored in 1, 2, 3, 4, 5 order, then, because that's how their order is in your HTML. If not, you should be able to use their .id attribute to see which one is which.
    • Once you have your rating buttons in an array, you could use a for-loop to iterate through them an apply your event listeners. You can see that your event listeners look very similar, except with a couple numbers switched around. In pseudo-code (with ratingButtons your array from the previous point), it should be something like
    # `i` is the value of the rating button
    function onClick(i)
      for (ratingButton in ratingButtons)
        if ratingButton.id == i
          activate ratingButton
        else
          deactivate ratingButton
        
        set choice to i
    

    You could even use a for loop to assign this event listener to each rating button (that's why onClick takes the value i as an argument.

    Hope this helps!

    Marked as helpful

    0
  • P

    @GregLyons

    Posted

    Your solution matches the given design pretty well. I also see that you're using classes (rather than IDs) for styling, which is good for code reusability. Here are some suggestions I have based on your code:

    1. Favor using semantic markup (e.g. <p> for text, <h1>, <h2>, etc. for headings) instead of <div>'s. For styling purposes, like the container for your card, it can be useful to use a <div>, but things like search engines and screen readers use the HTML tags to understand your page. So using semantic markup will make your website more accessible and have better SEO.

    2. I'm not sure it's necessary to wrap your <img> in a <div>, as you should be able to apply "display: block" so that it acts like a block element (text doesn't wrap around it) instead. I believe this is what you intend, as I don't see any styling on your wrapper .QR-img <div>.

    Marked as helpful

    0